Learn JAVA basics. As any other coding language basic, learn how to print output Hello World!
And then take your learning skills to a whole new level.
So lets start.
Required software: Download and install Java Development Kit. Download and install NetBeans. Steps:
- Create an IDE project.
- Add code to the generated source file.
- Compile the source file into a .class file.
- Run the program.
To create an IDE project:
- Launch the NetBeans IDE.
- On Microsoft Windows systems, you can use the NetBeans IDE item in the Start menu.
- On Solaris OS and Linux systems, you execute the IDE launcher script by navigating to the IDE’s
bin directory and typing ./netbeans.
- On Mac OS X systems, click the NetBeans IDE application icon.
- In the NetBeans IDE, choose File | New Project.
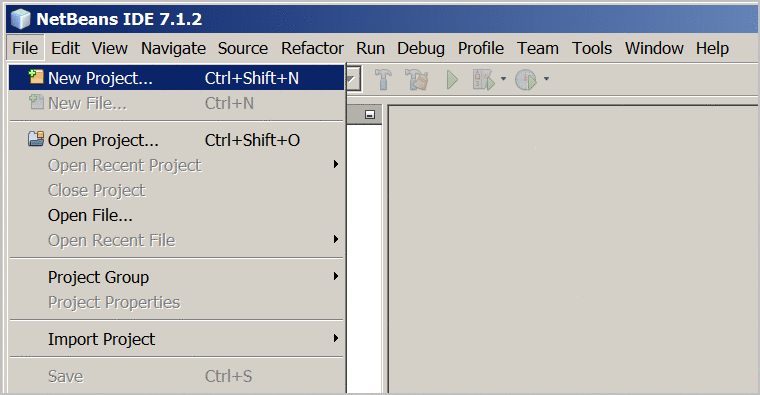 NetBeans IDE with the File | New Project menu item selected.
- In the New Project wizard, expand the Java category and select Java Application as shown in the following figure:
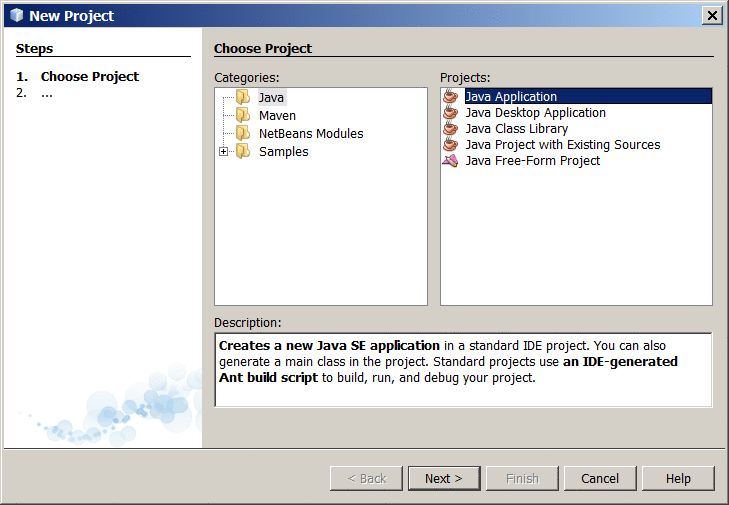 NetBeans IDE, New Project wizard, Choose Project page.
- In the Name and Location page of the wizard, do the following (as shown in the figure below):
- In the Project Name field, type
Hello World App.
- In the Create Main Class field, type
helloworldapp.HelloWorldApp.
- Leave the Set as Main Project checkbox selected.
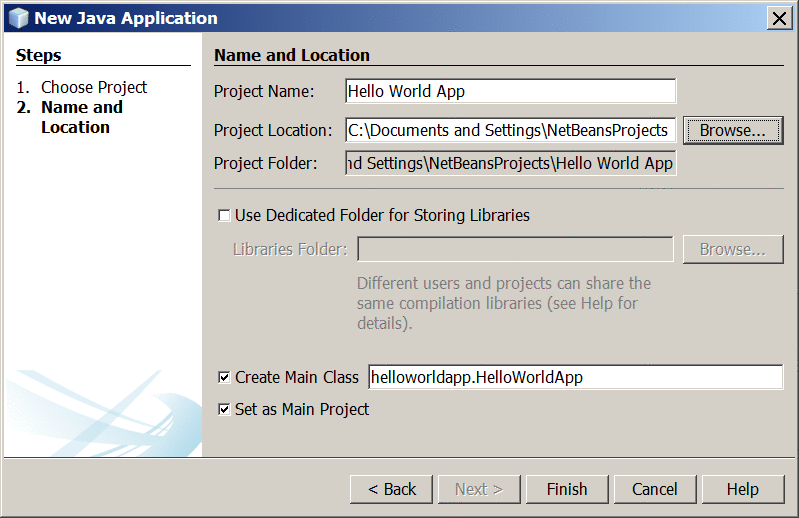 NetBeans IDE, New Project wizard, Name and Location page.
- Click Finish.
The project is created and opened in the IDE. You should see the following components:
- The Projects window, which contains a tree view of the components of the project, including source files, libraries that your code depends on, and so on.
- The Source Editor window with a file called
HelloWorldApp open.
- The Navigator window, which you can use to quickly navigate between elements within the selected class.
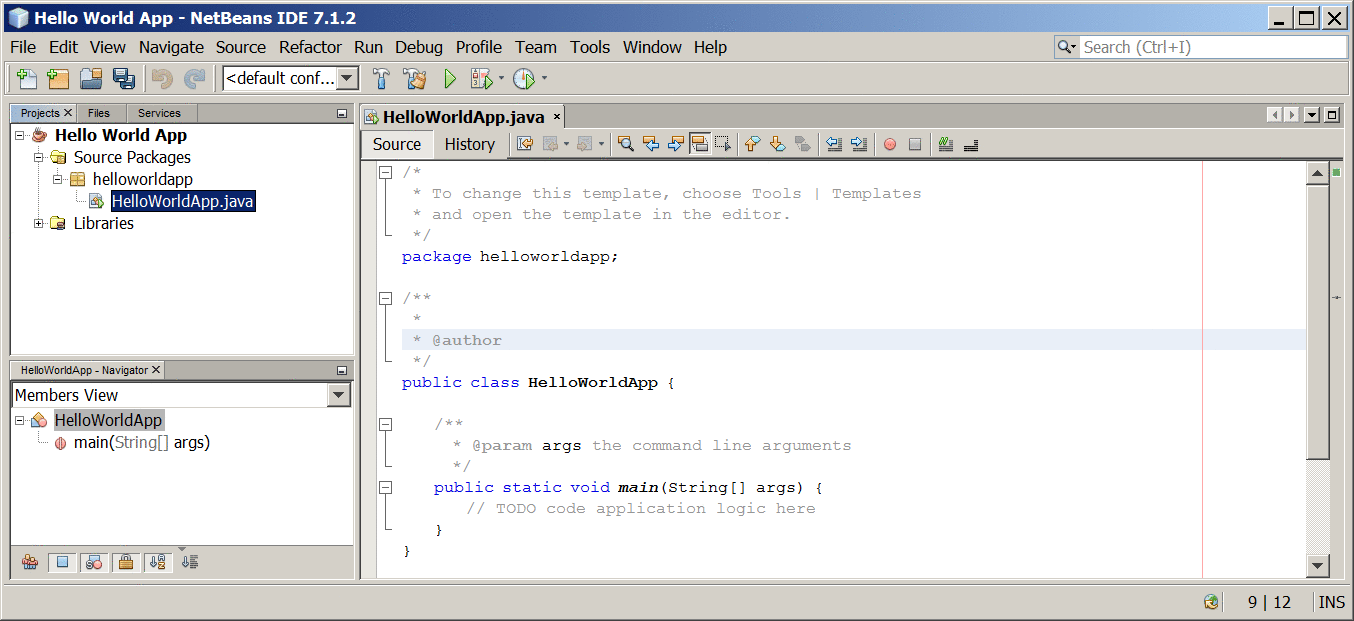 NetBeans IDE with the HelloWorldApp project open.
Add Code to the Generated Source File
When you created this project, you left the Create Main Class checkbox selected in the New Project wizard. The IDE has therefore created a skeleton class for you. You can add the “Hello World!” message to the skeleton code by replacing the line:
// TODO code application logic here
with the line:
System.out.println("Hello World!"); // Display the string.
Optionally, you can replace these four lines of generated code:
with these lines:
/**
 * The HelloWorldApp class implements an application that
 * simply prints "Hello World!" to standard output.
 */
Compile the Source File into a .class File
To compile your source file, choose Run | Build Main Project from the IDE’s main menu. Now that you have built the project, you can run your program.
Run the Program
From the IDE’s menu bar, choose Run | Run Main Project. The next figure shows what you should now see.
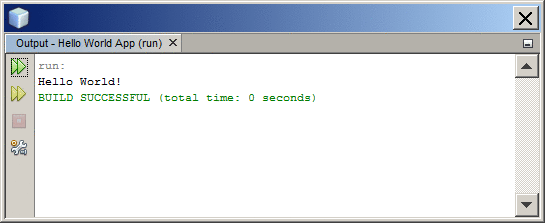
The program prints “Hello World!” to the Output window (along with other output from the build script). Congratulations! Your program works!


